
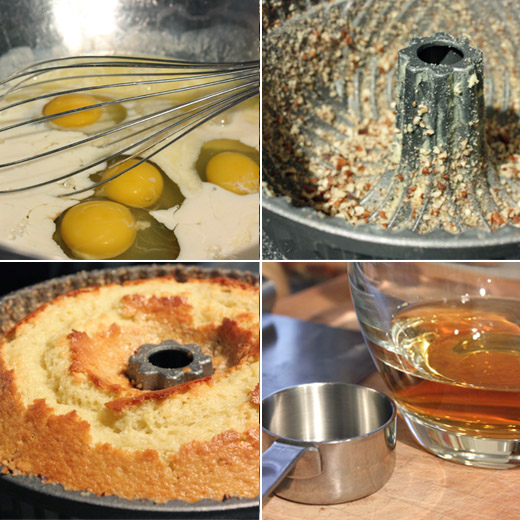
 . It’s similar to a holiday cake that gets soaked in a liquor-filled glaze only this is much simpler. In this case, you only apply the glaze once rather than several times over days or weeks, and the cake batter is one of the easiest ever to whisk together. The rum and orange juice and zest in the cake and the finely chopped pecans that end up coating it give it fantastic flavor before the rum glaze is even applied. Rum cakes that are soaked multiple times can end up tasting very boozy and I do quite like the taste of rum, but it’s not overwhelming here. In the glaze, the rum melds with melted butter and brown sugar into a lovely butterscotch with just a hint of rum. Soaking the cake with the glaze also extends the life of the cake. It gets better as it sits, and it lasts a few days longer than it would otherwise. To gild each serving a bit more, I whipped cream with Grand Marnier to top the cut pieces. This simple whisked batter started with flour, sugar, baking powder, and salt being combined in a large bowl. In a separate bowl, milk, orange juice, vegetable oil, eggs, orange zest, and rum were whisked together and then added to the dry ingredients. The batter was stirred to combine and then carefully poured into a bundt pan that had been buttered and sprinkled with toasted and chopped pecans. You want to pour the batter slowly to as not to dislodge the pecans. The cake baked for about an hour, was left to cool, and was placed on a serving platter, and that’s where I learned a lesson. You should place the cake on a rimmed platter. I somehow believed that the cake would absorb every single bit of the glaze, and I foolishly chose a flat platter. The glaze was made by melting butter in a saucepan, adding sugar and water and stirring while simmering for five minutes. The rum was added off the heat. The cooled cake, on a platter with a rim, is then pierced all over with a wooden skewer before you slowly spoon the glaze over top. Most of the glaze will be absorbed, but some does collect around the base of the cake and that could work its way to the edge of a platter without a rim and dribble all over your dining room table. Whip some cream with a little sugar and Grand Marnier to serve with the cake.
When I read a cookbook, there are always recipes that stick in my mind, that I continue to think about for weeks. When they're recipes for things that aren't in season at the time, I make mental notes about what future occasions would be good opportunities to serve each particular dish. So, last year when I read Ad Hoc at Home and saw a lovely looking cream of cauliflower soup with beet chips, the winter vegetables and red and white colors made me think of Christmas. This being a Thomas Keller recipe and my first time trying this recipe, I didn't want to be making this on the actual day of Christmas. Instead, I chose a day during the holiday season when I had plenty of time to work my way through each step, use each and every pot, pan, and utensil I own, and then wash all of those dishes after dinner. Yes, it is a little bit of a process to follow the recipe exactly, but it all came together nicely to make a velvety smooth soup with crispy, crunchy, and tasty toppings.The first step is to chop the cauliflower. Most of the cauliflower, including the stems, were cooked and pureed, but some florets were set aside for a garnish. For the puree, onion, leeks, coarsely chopped cauliflower, and some curry powder were cooked in melted butter. Equal amounts of milk, cream, and water were added, and it was left to simmer until the cauliflower was tender. The mixture was pureed in batches. To make things easier on the day you plan to serve the soup, this puree could be made in advance and just re-warmed before serving. Next, a red beet was peeled and thinly sliced on a Japanese mandoline. I used a candy cane striped chioggia beet from our farmers' market. The paper thin beet slices were fried in oil in a small saucepan and left to drain on a paper towel-lined rack. Then, the reserved cauliflower florets were blanched in water with a little vinegar. Keller notes that the vinegar helps keep the cauliflower white. The drained, florets were then sauteed in melted butter. At the same time, I also made the requisite torn croutons which were slowly browned in a mix of garlic oil and melted butter with the goal of the croutons absorbing the flavor of the oil and butter while taking on a crisp outer texture. The soup was served in wide bowls topped with the florets, then some torn croutons, a stack of beet chips, and a swirl of extra virgin olive oil. The other garnishes held the beet chips up and out of the soup so they stayed crisp.


 which is a two-day process unless you need to bring your sourdough starter to room temperature and feed it before you get started in which case it becomes a three-day process. The first two days’ tasks are minimal, but the waiting time between days is necessary. This panettone recipe is made with a fairly rich dough with an egg and an additional egg yolk and half a cup of butter, and even though the dough is soft and a little sticky, it wasn’t difficult to knead or shape. The fun part was mixing the dried and candied fruits with rum, Gran Marnier, and vanilla so they could sit overnight to plump and absorb great flavors before being mixed into the dough. I made one big loaf in an eight inch springform pan and used the rest of the dough for muffin tin-sized mini panettones.


